Sunday, December 23, 2012

Ugly "Happy Holla Days" Sweater

My high school has Ugly Sweater day the day before break each year.  The past 2 years I would take a sweater for my mom's closet and she would be offended.  I found my idea on Pinterest and knew it would be my new Ugly Sweater!

Here is my final product!

Here is my Pinspiration:

What you need:
  • blank ugly sweater (Mine is from Target)
    • thrift shops, clearance at any clothing store
  • felt (JoAnns)
    • I used a green that has glitter on it
  • chain (JoAnns)
    • The original used pipe cleaners which would be cute.  They even have shiny pipe cleaners
    • I used chain that is used to make necklaces
  • hot glue gun
  • scissors
  • template with your font choice for "Happy Holla Dayz"
  • needle and thread to sew on the chain
  • card board fir inside the sweater so that the hot glue does not stick to the back of the sweater
  • small bowl of ice water (just in case you burn your fingers on hot glue... like I did)


What you do:
  1. Pick your font and trace onto the felt.  I traced my letters on backwards so that the ink would be in the back and I would not have to cut perfectly 
  2. Plug in hot glue gun
  3. Cut out the letters
  4. Place sweater (with cardboard inside) on table next to hot glue gun
  5. Also place your bowl of ice water on the table!
  6. Lay letters out on the sweater
  7. Start gluing letters onto sweater
  8. Stitch the chains at the seam on the shoulders of the sweater
  9. ALL DONE!


Thursday, July 19, 2012

Wedding Streamers

Our venue did not allow sparklers or throwing rice, so lovely Pintrest and Meggan Brownrigg, gave me the idea of STREAMERS!!

My mom and I went to Michaels craft store during one of their sales on ribbon.  We found many different ribbons in the purple and orange (my favorite color is purple, Andy's is orange) color theme.


materials:
  • various ribbons, we used varying lengths too
  • dowels, ours were one foot long.   
    • We bought them long and my dad cut them down
    • Then we sanded the ends so that they weren't sharp
  • yard stick
  • scissors
  • hot glue gun
  • twine, for the bells
  • small bells, when you ties them onto the twine keep the bell close to the stick so that it rings better


Ribbons:
  • "Happily Ever After" ~ on all streamers
  • Purple with white darting ~ on all streamers
  • Sheer Orange ~ on some
  • Purple with white design ~ on some
  • White with purple design ~ on some


Final Product

How to do it:
  1. Get your friends and family together to start cutting ribbon
  2. You also need to start stringing the bells on the twine with a large needle 
    • once all the bells are on then you can start cutting the twine with one bell per piece
    • knot each bell so that they don't slide off
  3. Using the hot glue gun glue the bell and twine to the top of the stick
    • while the glue is still wet knot on the dowel over the twine
  4. To secure the ribbons we added one last bit of glue
  5. Ta-Da!


Cocktail Hour Games

Andy and I LOVE playing games.  We wanted to have games for people to playing during the cocktail hour.  One game that we had out on the lower patio was 2 games of corn hole, compliments of my dad!  One of the sets is Lauren's and she did all the hard work of painting it... I will try to add pics later.

This booklet was found online:
cover

first inside page

inside

back pages

back cover

We used purple and white twine to tie them together (the wedding color was purple).
These booklets were laid out with a tray of crayons for guests to use.

Cathy's Touch!

Wedding's are expensive, that's not new news!  We did A LOT of DIY for my wedding.  My mom is an incredible painter, and tried a new medium working with water color in addition to her normal acrylic.  All of the invitations, ceremony booklet, and menu cards turned out PERFECT!

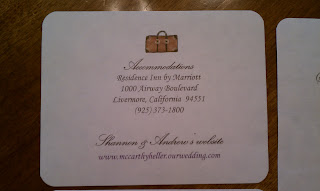
Accommodations card

Reply card

Invitation card

Bachelorette Party invite

Bridal Shower invite

I will add later the ceremony booklet and menu card :)

Thanks Mama!


Friday, June 22, 2012

Wedding Flip Flops

Ladies... we all know that the cute shoes we wear for pictures and the beginning of the party are not staying on our feet for the entire night!  Our feet will love us for sliding into flip flops :)


Old Navy has cheap flip flops and once you dress them up they are not boring anymore!  However, feel free to use any brand you want.  At this point in the wedding planning process and all the checks, credit card transactions, etc. I was all about $2.50 sandals!

What you need:

  • flip flops
  • ribbon 
    • ~ I used a satin that is the color of my wedding.  Purple!! Although some of the pics it looks blue
    • I used about 1.5 yards for each flip flop; almost a full 3 yards total
  • silk flowers
  • hot glue gun
  • scissors


Now What???
The Process:

  1. Cut off the silk flowers.  I used 5 per flip flop.  Mine are sort of small.  The Pinterest I stole this from used larger flowers which was also really cute.  The store I went to had a limited purple selection.


2.  Take your first flip flop and get ready to start hot gluing the ribbon


dab a small amount of hot glue to get the ribbon secured.  You will go back over it to cover up the slightly frayed edge.


Start wrapping the ribbon...


After a few wraps I dabbed some hot glue to secure it.  Probably about  every 1/2 or 3/4 of an inch I would add some hot glue.  Or if I came to a point where the ribbon wasn't laying the way I wanted it to.

3.  Now you're ready to start adding flowers...

I put some hot glue on the tip of the stem and slid that under the ribbon


You can't see it, but I added another dab of hot glue at the top of the stem and then wrapped the ribbon around one more time before moving it about the flower


I added another dab of hot glue here and placed the next stem into the glue and wrapped the ribbon around once


Keep doing this until to get to the point of the flip flop :)

4.  Now the hard part is done!  Just keep wrapping down the other side until you get to the bottom.

Don't forget to add hot glue every 3/4 of an inch to secure the ribbon


Ta Da!  You're all done!  You're $2.50 flip flops look like... well not quite a Million Bucks, but close! ;)


My feet have marks from me sitting on the couch with my feetsies under me.  You may have noticed that purple is definitely my favorite color... it's on my finger and toe nails :)

Happy Crafting!


Sharpie Mugs

So, I am going to start with saying I have not yet washed the mugs in the dishwasher... because I am nervous! :)  I want my friends to see them before I find out if the Sharpie really does stay on.  I will comment soon to let you know the results on if they really are dishwasher safe!

What you need:
Sharpies ~ More fun if you have multiple colors
Oven ~ Preheat to 350*
Mugs~ If using color Sharpies you probably want white, but if just using black then any color
       Also, the mugs need to be able to go in the oven, most porcelain is safe... or so it said on Pinterest.
       I got my mugs for $3.50 at Walmart.  I went to the $1 Store, but they were all flawed mugs.  Walmart had some cheaper ones, but I liked this one better.

What do you do:

  1. Preheat oven = 350*
  2. Wash the mugs before getting crafty
  3. Decorate your mug(s)
  4. Stick them in the oven for 30 minutes, I did about 40 to be safe ;)
  5. Let them cool completely before washing or using
  6. Enjoy giving as a gift or keeping for yourself!

Andy bought me this AWESOME pack of Sharpies a while back!


Some of the pink flower faded... not sure why


another angle... Not showing the names yet, although she probably knows who she is ;)


Left a signature.  This also shows the mug is dishwasher safe and oven safe.


Andy's Birthday Gift

So Andy and I are not big on giving gifts.  We kind of buy each other things as we need or find them.  This year I was on Pinterest by the time his birthday came around so I had many ideas to choose from.  We love playing games so I decided on "52 Reasons why I LOVE you!"  Since we are currently not living together during the week it is good to remind him there are so many reasons that I love him!


I used a large printable address label


Added his Birthday~ 3/22/?  :)


Just a few samples of mushy ideas, haha


He didn't know that one of the phone calls he made to me while traveling in Europe would cost over $80, but I do remember the call!! :)

So there is it!  Easy gift, thoughtful, and cheap too!

Saturday, April 28, 2012

Andy's Green Thumb

Andy is also a Pinterest fan, so I felt it's only fair to also share his pinterest tasks as well :)

He has done two for our back patio.

The first is the popular Pallet Garden.  He got 2 pallets from our friend Justin.  The first one he spray painted a greenish color and is growing different veggies and herbs.

The darn blog will only post it sideways... so from left to right (but should be bottom to top) 
  • lemon cucumbers
  • parsley
  • sage
  • parsley
  • garlic chives
Eventually, on top there will be lettuce.  Before the pallet gets turned on its side and put against the fence all the plants need to take root in the soil.

His next idea (which I must add is his own original idea) is with the second pallet.


This pallet has cucumbers on the bottom, and one lemon cucumber (he thought he grabbed another normal cucumber, but being the goob that he is, that was not what he actually brought home).

His plan for the top is string beans which should grow up the chicken wire.  The chicken wire is attached to our overhang with hooks.  (Last year we had the ugly tomato baskets on the hooks and I am glad those are gone!)

He says the cucumbers are also supposed to climb up the chicken wire.

The last part of the garden that is done are the tomato plants.  He had some awesome tomatoes last year... I'm taking his word because I don't really eat tomatoes, so hopefully this year is just as good if not better :)


I will update as the plants grow and give us yummy results!

Sunday, April 22, 2012

Wedding Table Numbers

So I saw a cute idea on Pinterest for using engagement photos as table numbers.  It is a great way to showcase all the awesome engagement pics and also serve a purpose.  There are plenty of websites that you can pay over $1 a pic, but thanks to Andy and playing around on the computer I am able to design them myself and then have Costco print them for .14 each  (or in my case .09 thanks to a coupon my mama has).


Now, how did I do this... with limited computer knowledge?  
What you need: Picasa... Google photo program (it's free!)

Fair warning... this is some what time consuming especially if you are working with large photos!

What you do:
You go into Picasa and find the photos you want to play with.  
You click on the first one to edit.
You will be shown different edit options.  
Click on "Edit in Picnik" ... there will be some wait time while is grabs your picture.

What I did to this photo specifically:
1. Crop the photo
2. Click on the "Effects" on the top of your options
3. Scroll down to "Focal B&W" this allows for the pop of color
4. Click on the "Text" on the top of your options
5. Enter the text in the box and have fun picking fonts!  There are SO MANY!
7. Click "Add"
8. You can make it larger or smaller with the mouse and dragging. 


Now the possibilities are endless! 

You can add hearts, bug eyes, wounds, fading, text, and so much more (under "Decorate")!

Friday, March 16, 2012

Fun with Dyed Rice

Another perfect craft for rainy day weather.  It is like playing with colored sand, but the process of making it is half the fun for the kiddos :)

What you NEED:
* 1 cup of dry white rice for each color you want (I made 6 colors = 6 cups of rice)
*food coloring (There are some fun colors out there now, but I just used the main 4 and mixed for other colors)
*vinegar (1-2 tbsp per color)
*plastic sandwich bags, 1 bag per color x2 (one bag per color for the wet process, and one for storage once it is dry)
*cookie sheet(s); used for drying out the rice
*a dish for mixing colors
*paper or card stock (since the glue gets paper soggy you might prefer card stock)
*glue

Optional:
*wax or parchment paper, this makes it easier to pour the rice back into baggies

What Next?
1. Pour a 1 cup of rice into each ziplock bag
2. In the mixing dish mix your vinegar and food coloring
3. Pour the liquid mixture into the bag of dry rice and close tight getting rid of as much air as possible.
4. Now the fun part for the kids... mush the rice around in the bag until all of the rice gets colored.  If the color is not as vibrant as you want simply open the bag drop, some more color in, close up and mush some more.
5. Once the rice is evenly colored pour it onto the cookie sheet to dry.
You can see I only eyeballed my 1 cup of rice.

6. Once it is dry pour it back into a dry bag.  **This is why I loved using the wax paper.** What I did, if you look at the image above, is push the rice to the sides and cut down the center so that I could easily pour the rice into the bag.
**another trick I learned from Andy's grandpa: put the bag into a mug and pour in without needing more hands than we have ;)

 Now the kids are ready to play and get creative with the rice.

We used glue bottles to draw the designs and sprinkle rice onto the wet glue.  Again, I used the cookie sheets for easy clean up to pour the extra rice back into the bags. 
You could also have an extra bag for a rainbow selection of mixed colors.

Ta Da!


Thursday, March 15, 2012

Popsicle Stick Puzzles

Since it has been very rainy this week in the Bay Area I needed some ideas to keep the kids entertained indoors.  On Pinterest I typed in: "Rainy Day" and tons of options popped up.  Here is one.

What you NEED:
*glue
*paint brush (I used a cheap one that I didn't mind getting glue on)
*razor blade or paper cutter
*fat popsicle sticks ($2 at Joanns, or $4 for colored ones; the colored ones would be good so the kids don't confuse the puzzles, or keep them in separate bags)
*pictures (personal, magazines, greeting cards...)
*baggies or envelopes for storage
Optional:
*dish to have the glue in for easy painting (I cut a Starbucks cup down low; free if you just ask next time you go in and then you can throw it away for easy clean up)
*duplicate image for reference when putting the puzzle together (I thought of this after the fact)


Now what?

Take your first image and get ready to cut.  A razor blade works, but I prefer the paper cutter since it is a little speedier.
1. measure the width of the popsicle stick
2. mark small dots on your image
3. cut/slice a straight line across the image
This one I used the razor blade, so the cuts are not too straight

4. Now glue the strips onto the popsicle sticks

if the images are from a magazine you only need a thin layer of glue.  Spread the strip out smoothly.  While it is wet it will look rippled, but it will dry smooth. 
You can see that this puzzle has a print on both sides.  You can get 2 sets of puzzles, but you will want to make sure that both images will use the same # of popsicle sticks.

Here are some more pics:


Next time I will take a picture of the image before I cut it up so I can stick it in the baggie with the puzzle.


And let the FUN begin!